Tuesday, December 16, 2014

Castle Mountain and area, Oldman Mountain, and Deer Ridge East.

A few weeks ago I was looking at my tally of hikes for this year.  Though I've had fewer entries here, I have been able to string a number of things together, and have, in less days, been able to nearly equal the number of new destinations in RMNP that I did last year (110 in 2013 vs 100 thus far in 2014).  
I also started counting my mountain bike rides for the year, and found that I was getting close to 100 there as well.  The late season goal became to do 100/100, and it was just two weeks ago that I was able to finish this goal off.  Deer Ridge East was my 100th destination for the year in RMNP, and an old favorite, Hall Ranch, was ridden a few days later to hit 100 days mountain biking for the year.
Unfortunately, a few days later I headed out for ride number 101 and crashed hard, breaking my helmet and sustaining a minor concussion in addition to the normal scrapes and bumps.  Worst of all I sprained the AC joint (the ligaments that hold the collarbone to the shoulder), which means I can't carry a backpack or ride.  Thus my 2014 is pretty much over.  Ah well, it's been a fun one, and at least this accident happened after meeting those goals.
I started out this day aimed at Castle Mountain.  Since I knew it would be a shorter day out, I didn't set my alarm for 3am.  Getting up later was pretty great.  When you reach Estes, continue on 34W past the Stanley Hotel.  Right around when 34W intersects with 34 Business, look for parking on the right/north side of the road.  There are two pullouts, a smaller which is before the intersection, and a larger which is right next to the intersection.  From the larger, walk east on 34 and look for the start of a trail on your left.  A trail starts directly up from the smaller parking area.  Either way, you should cross into NPS land almost immediately.
This is another area where there are a multitude of trails leading every which way, and I found it better to just pick the general direction I wanted to go and head that way.  The bushwhacking is not bad at all. 
Pretty forest and Lumpy Ridge-esque rock.
You may cross or stay briefly on an old jeep road or two along to way, but you'll generally want to head north to get the elevation and then west to head toward Castle Mountain.  It looked like some harder, cliffy stuff could be faced if you headed directly northwest from the parking.
Since this area faces directly south, it was clear of snow for the most part, and I imagine it would stay that way throughout the winter, provided there wasn't a recent storm.  
Oldman Mountain becomes visible on the left.  
And I could see what would become my 100th named destination in RMNP for the year, Deer Ridge East.  It is certainly alot more spectacular than Deer Ridge West!
Once you reach a place where the terrain starts to flatten out, you can start to head west to the summit of Castle Mountain.  Work though and around some rocky areas, and ascend to the summit from the north.  Of course I encountered some snow on this north facing slope, but it was minor.  There are some sections of second class climbing along the way, but take your time and pick a safe route and you'll be fine.
All the lumps of Lumpy Ridge.
Here is Castle Rock as seen from Castle Mountain.  This unranked high point is to the east.  It looks impressive!  Simply head back the way you came and continue toward it.  You can stay north of the rocky stuff pictured before it and avoid anything difficult.
A zoom in on one of the many post flood mudslides in the area, seen on Lumpy Ridge.
Here's another big on on McGregor Mountain.  Both of these slides ended up washing into Black Canyon Creek.  It was crazy to see the devastation.
Again, I approached Castle Rock from the north side.  The south side ends in steep cliff faces.  This gully provided a relatively stable second class walk up, but ended with a third to fourth class squeeze up a chimney, or a third to fourth class way around that, with a short climb up a slab and then a somewhat daring (in the snow that was there!) large step across the gap at the top of the chimney.
I did the slab and step across on the way up, and then dropped into the chimney on the east side on the way down.  That felt a bit more stable with the small amounts of snow in the area.
From here I could see my next goal- Window Rock.  Apparently, the easiest route to the summit is 5.0, which with a partner might be soloable.  But since I was alone...
From Castle Rock to Castle Mountain and beyond.
It looked like I could find a way up, but took that soon became too hairy for me.  I went back and down and then up and then down.  I eventually found a way up to the window.  I would say even getting to the window itself requires some third to fourth class movement with a little bit of exposure. 
The window.
Here I am standing in the window, looking straight up.  A pretty neat feature!  Glimpsing though the window to the east yielded some good views of Lumpy Ridge and Estes.
Looking west, I got some great views of the minor peaks on the east side and the snow capped peaks of the continental divide.
I looked for a different way down, but decided to return to my method of ascent.  Then it was simply head south and west as I could to get back to the car.
There are lots of interesting rock features in the area, in addition to some very hard climbing.
I got back to the car and took off for the next stage of the journey: Oldman Mountain and Deer Ridge East.
You'll want to get on 34 Business, and look for Old Ranger Drive on the south side of the road.  Turn onto this street, and follow it until the end.  You'll hit a gate with a turn around marked no parking on the left.  Turn around and park just down the street from this turnaround, taking care to get your vehicle off the road as much as possible.  Since you'll be able to get cell reception for most of the time you are up here, it would be nice to leave a note on your dash with your phone number in case.  The owners of the property beyond the gate allow hikers to pass through.  Please be respectful of this private property.
Once past the gate, pass the cabins and look for a trail on your right.  This will take up up a gully.  Near the top of this gully, look left.
You'll see this huge boulder on some slabs.  It looked a whole lot like Meatwad to me.  Head toward this boulder.  I found it easy to just head toward the high point in general.  As you get closer, you may find some more difficult terrain.  At this point, move right and circle around north.
You'll come upon this slabby crack which is the definitive crux.  Ascend this easy third class crack and find the summit shortly after.
Look north to enjoy views of Castle Mountain and area.
To get to Deer Ridge East, I headed back down the same way I'd come.  I picked up the dirt road that I left and simply headed up. 

Views of the west side of Oldman Mountain.
Continue up as the road shrinks to a trail.  You'll reach an intersection with four different options if memory serves me correctly.  You want to take NOT the left most option, but the second to left most.  It heads the wrong way from Deer Ridge and heads into forest, but does not loose elevation.  The next landmark you'll see is some heavy plastic coated electrical wire wrapped around some trees on your left.  I suppose this was used by a property owner to mark their property.  Do not cross.
In a short time and with a little bit of elevation, the trail will gain the ridge line and turn to head west. 
Deer Ridge East getting closer.
I spied Ptarmigan Glacier quite well covered in snow.
Within maybe 15-20 minutes, you will see some signs and cross into RMNP.

There it is!
If you look at a topo, you'll see that the trail curves to the north and looses some elevation around Deer Ridge East (point 8763).  When this started happening, I took off to the left up the snow covered slopes.
Again, a few second class moves are required near the top.
And there I was, the 100th named destination of the year.  A snack was had along with a few minutes of reflection. 
I could see the wind was absolutely ripping to the south on the higher peaks.
I turned back and headed down.  It felt like it took a much shorter time for me to get back to the trail than it did for me to get to the summit from the trail.  I suppose that is how it often goes.
I interspersed some jogging with hiking on the way down, made it back to the car in a very reasonable time, and then drove back down to Longmont.
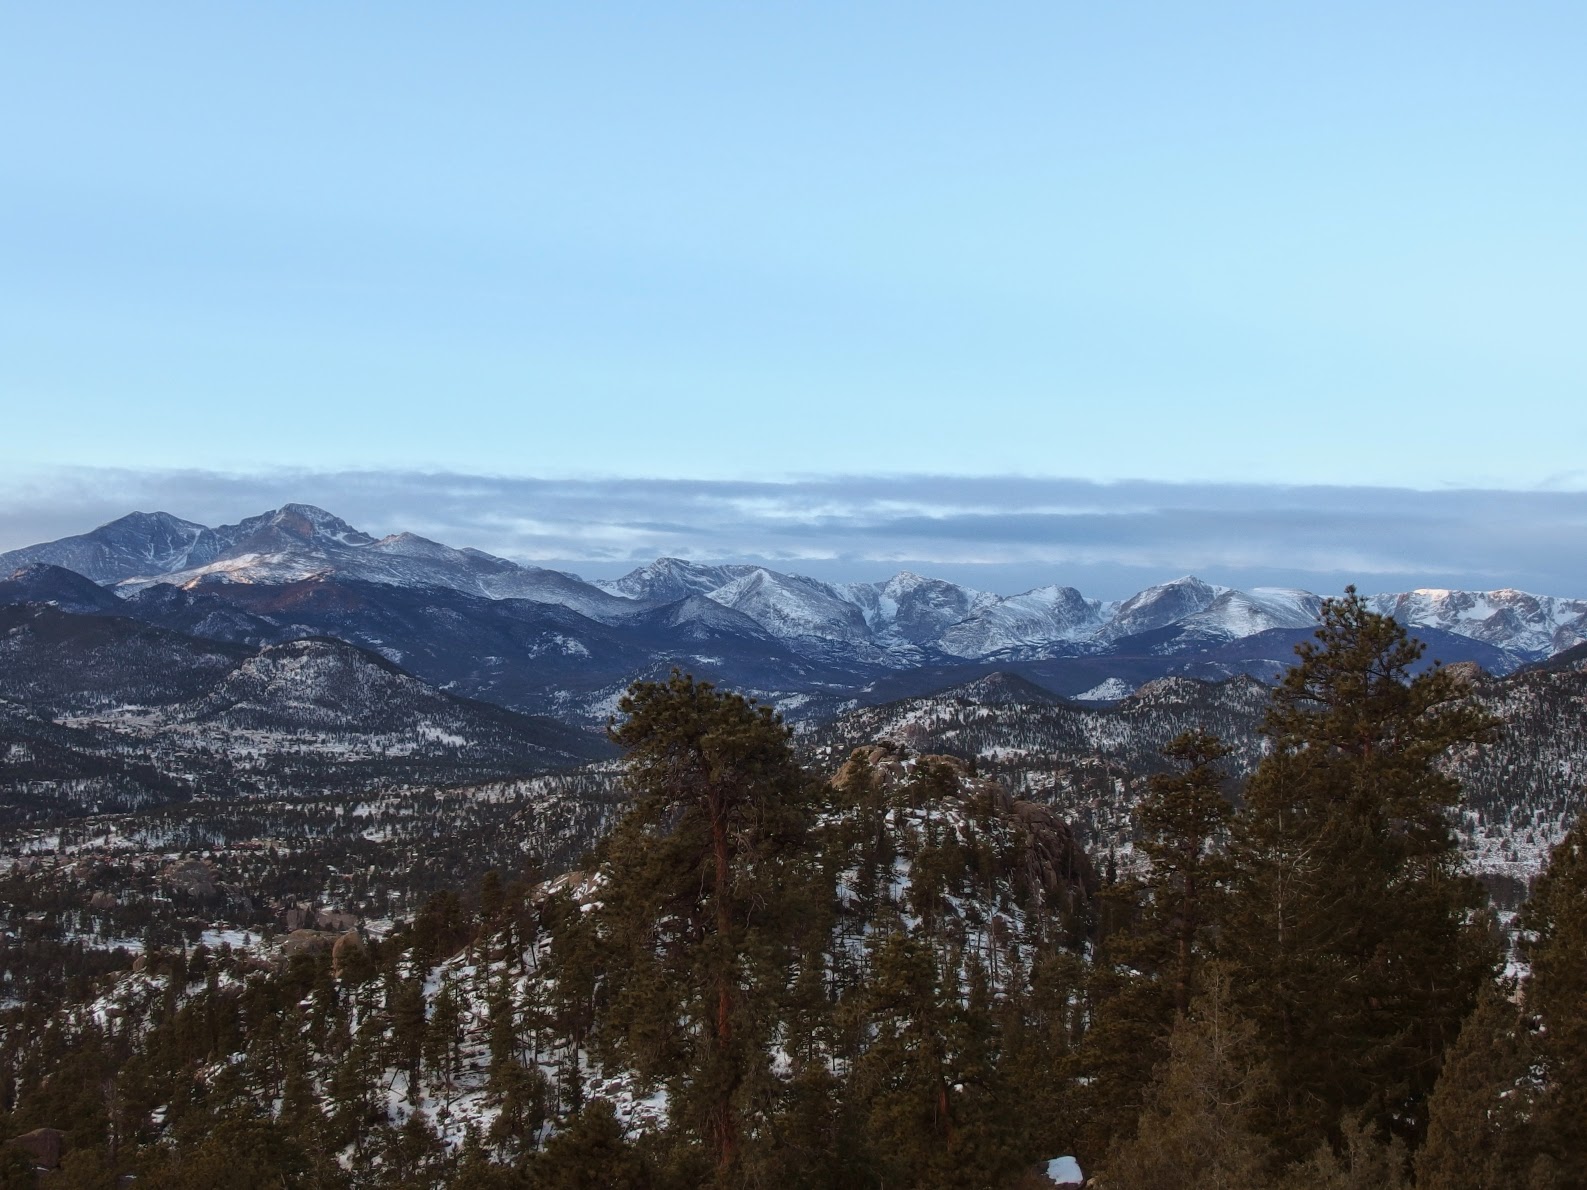
This was a good day.  I think places like Castle Mountain would be good destinations if you are trying to get off the beaten path a bit yet still want some challenge in the short and steep category.  Oldman Mountain and even Deer Ridge East aren't as difficult in terms or elevation gain or technicality.  But this would be a fun alternative to access Deer Mountain.  As you can see, these minor peaks also provide greats views of many of the higher peaks in RMNP, Estes Park, and the surrounding areas such as Lumpy Ridge.  I would actually suggest Castle Mountain as an off season hike (not summer).  I imagine during summer it will be sweltering since it faces directly south.
Castle Mountain and area, Oldman Mountain, and Deer Ridge East:
Castle Mountain, 8834 feet: .8 miles each way, 1134 foot gain.  Second to third class.  Moderate+.
Castle Rock on Castle Mountain, 8669 feet: .5 miles each way, 969 foot gain.  Third to fourth class.  Moderate+.
Window Rock, 8530 feet (summit): .6 miles each way, 830 foot gain.  Third to fourth class to the window, 5.0 to the summit.  Moderate+.
Oldman Mountain, 8310 feet: .3 miles each way, 510 foot gain.  Third class.  Moderate-.
Deer Ridge East, 8763 feet: 1.25 miles each way, 963 foot gain.  Second class.  Moderate.

Love!
Thank you for reading.  Look for my 2014 wrap up to come soon!

Wednesday, December 10, 2014

Lumpy Ridge Loop and Sheep Mountain Rock.

It was a dark and stormy night...
Actually, the night was quite peaceful, and despite some exceptionally high winds expected at altitude, the forecast lower down was looking good.
The early wake up saw me once again be the first person at the trail head, and the wind sculpted clouds sitting over the Front Range provided quite a show as the sun rose.
So, yes it was worth getting up early. 
A few minutes of this natural light show was all that there was to see.  Note: other than being resized, these photos have had no processing.  This is what the neon morning actually looked like.
Clouds rimmed with neon pink behind trees in the parking.
In a short time, I was on my way to Gem Lake.  This is a great moderate hike in the park, perfect for families.  I gained elevation on the trail, and got to the lake in about an hour.
Views to the south. 
And south west.
While at the lake, I decided to try to ascend "East Gem Peak" or "East Gemstone", an unranked and unofficially named destination in the park.  This is the high point that lies directly behind Gem Lake.  There are probably multiple ways up, but I decided to take what looked like the easiest method- gain the top of the bench behind Gem Lake and walk over.  This involves some 2nd-3rd class scrambling on slabs, and all was going smoothly until I came to a deep chasm near the summit. 
I spied this spray paint defacement on a rock along the way.
I looked for a way around this obstacle, loosing elevation and heading north east.  Eventually I decided I was spending too much time, and with the snow and ice on the slabby rock in the area, it was not a good idea to continue.  This will have to wait for a time when everything is dry.  It looks like it will be a fun scramble, likely in 4th to 5th class to get up the chasm.
Onward, I started to loose some elevation as I dropped toward Cow Creek.  The next goal of the day became visible, the aptly named Sheep Mountain Rock, here seen just left of center.  Of course, I'd neglected to visit this when I was here last time, so a return trip was in order.
Sheep Mountain Rock on Sheep Mountain.
I crossed the creek and basically followed the mudslide area up until it started turning east or right.  Then I simply picked a way up the gully on the left.  The bushwhacking isn't too bad, but it is rather steep, gaining almost 1600 feet in around 8/10ths of a mile. 
Along the way I spied a plant that looked familiar- I'd seen a young example of this species earlier in the year.  Pterospora, aka Pine Drops.  You can read some more about them here.
Closer up to see some of the structure. 
And closer still...
I finally got to the top of the gully and headed west.  After spending some time looking around and taking GPS readings, I determined that this was the high point.
With my backpack for scale.  There were alot of little random highpoints, but this looked to be the highest.  Of note, the LOJ highpoint is slightly south of here, but actually lower than this.
I ate a snack and headed back on down.
If you happen to want to see Pterospora, this is apparently a good place to find them, as I saw multiple examples on the way down.
I hadn't really explored the ability of my new camera to function in close up mode, but with manual focus, you can get the lens about 1 cm away from the subject, which is pretty neat.  You can actually see the tiny seeds in the pods here.  For reference, the pods are about the size of you pinky fingernail.
Pretty cool!
The damage incurred in the flood is no less amazing a year later. 
I made it back to the trail and promptly lost a layer of clothing.  It was getting quite warm!
Though I have hiked the loop in segments, I've never done it as a whole until now.  Some good views of Sheep Mountain Rock kept the spirits high.
I crossed the creek and found Rabbit Ears, a rock feature which gave name to the campsite location here.  To see the feature, find the actual camping spaces and move to the back of them.  Turn around to face south and there you are!
Back on the trail I spied Dark Mountain in the distance.  This provided a fun and memorable hike.
The trail remains rather flat with little elevation gain until you pass the last of the campsites.  Then it is on!
The highpoint is reached, and you start the descent back to Lumpy Ridge.  It was pretty fun to jog downhill in the snow, observing the various high points of the ridge.
Lumpy Ridge in all its glory!
Farther down I stopped and looked back to see this high wind blown cloud stretching between Lumpy Ridge and McGregor Mountain.  Very pretty!
Twin Owls towering over the area.
I ended up continuing on the trail toward Gem Lake rather than going back to the parking to take some time to explore the boulders in the area.  I'd climbed here years ago and it brought back some memories.
I suppose this wasn't the most prestigious hike, with the highest elevation being slightly over 9600 feet, but with the up and down and up and down and up and down, a decent amount of elevation gain was had anyway.  The loop itself is a fun challenge and circles a very interesting feature in the park, with many of the higher peaks visible in the distance from various points.  Sheep Mountain and its rock are rarely visited and can offer a sense of solitude in a place that is relatively close to McGraw Ranch/Cow Creek Th.  This trailhead is busy enough in the summer I wouldn't expect to get a parking place if you don't arrive early.
Lumpy Loop and Sheep Mountain Rock via Lumpy Ridge Th:
Sheep Mountain Rock, 9660 feet: 4.7 miles one way, 1808 foot gain*.  Third class.  Strenuous-.
Lumpy Ridge Loop: 10.7 miles round trip, 1275 foot gain*.  Moderate+.
As a whole this hike covered approximately 12.3 miles with 4666 feet of gain.  Strenuous-.
*= significant ups and downs along the way mean you'll actually gain a whole lot more than this.